

In terms of backup, cloud backup is one of the safest ways to make sure that your data are safe and sound. There’re a number of available cloud services that allow cloud storage where you can save your important file and access it later on, anywhere in the world! However, putting every single file manually in the cloud would take the amount of time proportional to the size and number of files.
Why not allow CloudBerry to do the job for you? CloudBerry Backup is one of the best cross-platform software solutions that will allow you to automate backups to your favorite cloud storage service. Welcome to CloudBerry Lab!
What is CloudBerry Lab?
CloudBerry Lab is a software company that develops file management and online backup solutions that are able to integrate with 20+ cloud storage providers including the major ones like Amazon, Google, Azure, and Oracle etc. Also you can backup on your local HDD/Network devices.CloudBerry Lab not only develops their backup solution. In fact, they also offer a number of other software solution for both personal/professional and enterprise level usage. Besides CloudBerry Backup, there are also CloudBerry Explorer (Windows client for managing files between the cloud storage and a computer folder), CloudBerry Remote Assistant (desktop sharing and remote control) and CloudBerry Drive (Windows app for mounting cloud storage on a PC or Windows Server) etc.
They offer their products in a freemium model. The “free” edition offers less utility than the “paid” version but should be more than enough for everyday usage.
Strength of CloudBerry Backup for Linux users
When we start talking about Linux users, there are a few things to keep in mind – the usage style (home/personal or professional/enterprise) and the Linux system the user is using. Linux is a platform that offers tremendous power for almost all the purposes, especially for the higher level of usage (servers and other enterprise-level implementation).Working with a command line interface is a piece of cake for Linux masters. However, not all the people are comfortable working with CLI and obviously, not everyone is a Linux master. That’s why CloudBerry Backup can be very powerful for average to pro Linux users.
Are you a Linux boss preferring to work with the CLI? Don’t worry! CloudBerry Backup makes sure that it’s compatible with all types of users – noobs to legends. Accompanied by tons of powerful features and advantages, the tool is totally worth it.
However, this tool is highly suitable for commercial environments. The pricing can be a bit overkill for general, home users.
Features
When someone is running the Linux system, in cases, it’s like not having something great to accomplish that simple task. Well, CloudBerry bakes their software perfectly so that they suit the need of every user, including the Linux lovers.Now, there are other backup solutions for Linux system. What makes CloudBerry stand up? Most of those backup systems require working in the CLI and other scripting tasks. That’s not suitable for most of the common users. CloudBerry Backup provides a great and simple way to work with backup – a simple, self-explanatory and elegant graphical UI.
There are also experts out there who prefer CLI rather than working with GUI. CloudBerry Backup also provides a full-fledged command line interface. There are also a number of other features like:
- Backup and restore scheduling
- Web interface
- Incremental backup – backup only those files that were modified.
- Block-level backup
- Strong encryption (256-bit AES)
Pricing
As I mentioned earlier, CloudBerry offers their backup tool in a freemium model.- Free – The first option is the “free” edition where the users can use for home/personal use only. There are also other feature handicaps like no encryption support, community support only and a limitation of manageable data (200GB).
- Personal – This plan supports all the pro features that CloudBerry offers like encryption support, data compression and customer support from CloudBerry. However, it’s still for home/personal use only while supporting 5TB of data managing.
The price is $29.99 and if you want a discount, you should check out “Volume discount”. - Server – Suitable for business usage. Provides all the features like “Personal” service, except for the allowance to use it in a commercial environment. Yet, there’s that 5TB data limitation.
The price is $79.99. If you want a discount, you should check out the “Volume discount”. - Ultimate – The best solution offered by CloudBerry Lab. It provides all the promised features like commercial usage, encryption, data compression, file system backup, and others. There’s no data limitation as well.
The price is a bit higher, $149.99. However, if you want to have a discount, you should check out the “Volume discount”.
Why CloudBerry?
CloudBerry Lab offers something that’s for the enterprise level usage. Keeping that in mind, there are pros.- Easy to use.
- Powerful encryption.
- Block level backup ensures that only newer or updated files are backed up, instead of the whole directory full of gigabytes of data.
- Compression of data saves to cloud storage consumption.
- Various backup solution availability.
- Suitable pricing for enterprise-level usage.
How to install CloudBerry in Linux?
Now, it’s time to finally use the CloudBerry Backup solution. Ubuntu will be used for demonstration purposes. An important thing to note – CloudBerry Backup only offers 2 types of installation packages – DEB (which is for Ubuntu, Debian, and derivatives) and RPM (SUSE, openSUSE, Red Hat, CentOS, Fedora, and derivatives).To start the installation process Download CloudBerry.
For Debian/Ubuntu 18.04/18.10/16.04/Linux Mint 19/18/17/and derivatives:
Once you download the DEB file, navigate to folder you have saved the DEB package and run this command:
For SUSE/openSUSE/and derivatives:
Once you download the RPM file, navigate to folder you have saved the RPM package and run this command:
For RedHat/CentOS/and derivatives:
For Fedora and derivatives:
How to run Backup?
I'll show you how you can backup with CloudBerry solution on your local system but don't worry you have variety of cloud choices and similar to setup, if you are interested in. The process is same for all operating systems (Linux/Windows/Mac OS X).The first time you launch the application, you have to register an account with CloudBerry. I’m using the “freeware” license. If you want to get the premium services, choose them accordingly.
Note that you may also need to enter additional credential(s)/key(s) for having access to your target cloud storage.
For starting a backup, you have to make a “plan” – a macro to run that you can even run later on. For creating a plan, go to File >> Create a Backup plan.
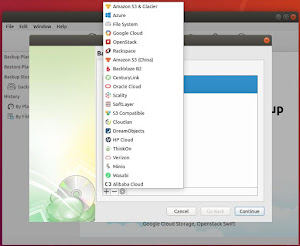
Now, you have to select the cloud storage solution you’re willing to use. For Demo, I’ll be using the local backup (File system).
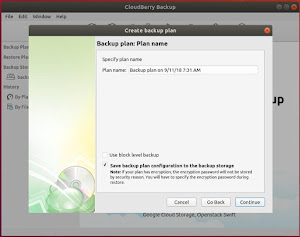
Select a plan name. By default, the plan name is selected depending on the time and date you’re creating it. Don’t forget to check “Use block level backup” for saving up storage space.
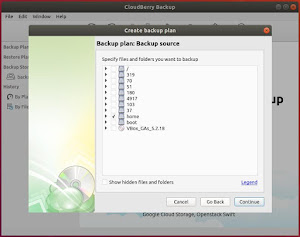
It’s time to select what directories you want to make a backup.
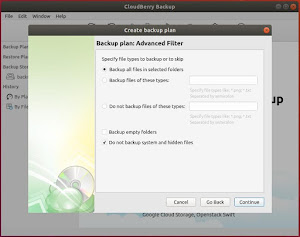
You can also specify what type of files you want to backup or not. Note that you have to specify those files by their file extension like PNG, MP4, and MP3 etc.
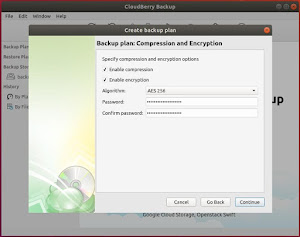
You can select the encryption method and the password.
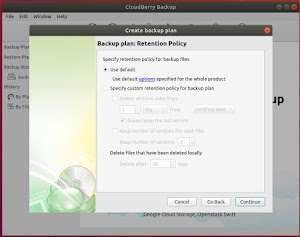
Select your data retention policy. For example, you may not need those backed up files, so you can select to delete them after the backup process completes.
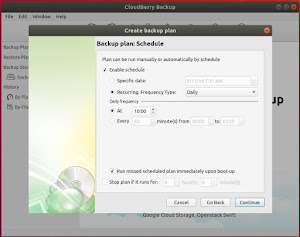
Select how often should the backup run. You also have the power to automate backup!
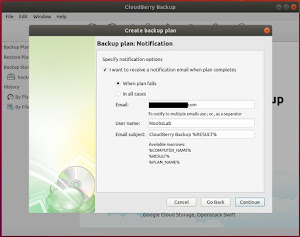
You can also get a notification to your email or desktop whenever the backup completes.
Review the summary. Once you click finish then select backup plan you just created and select “Start” to start the backup process.
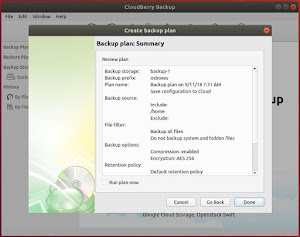
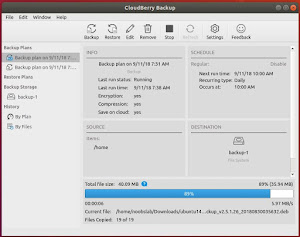
For restoration, click on “Restore” tab. Select the backup source. You can configure both auto restoration and one-time restoration.
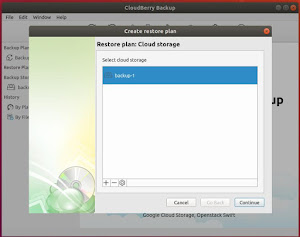
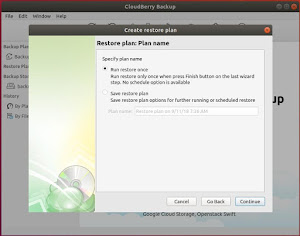
You can also select which backup you want by selecting the backup time.
Select the folder(s) you want to restore.
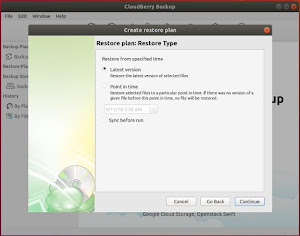
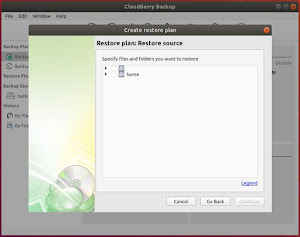
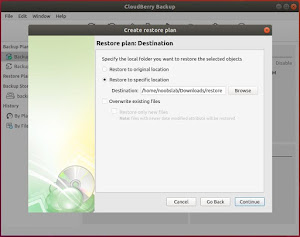
Choose the location of restoring the backed up files. Then continue and finish creating restore plan.
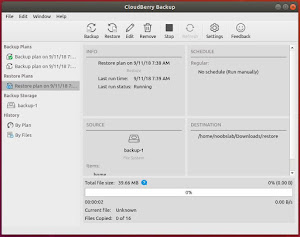
Once restoration plan is complete. You’ll also note that there’s a restore plan on the left side. Select and just hit start button to execute the restore process.
Summary
CloudBerry Backup is a brilliant piece of software that offers really powerful features and tremendous control over the backup and restore process. If you’re in need of consistently backing up important data to other locations like cloud or storage devices, consider the tool for yourself.Don’t forget to keep in mind its data limit. If you’re working with a heavy data flow, consider getting the “Ultimate” plan. Other than that, you have to be very careful to choose what price you’re willing to pay. Overall, CloudBerry Backup is a very satisfactory tool that will make your life more comfortable.


